


When you CASE the designer over at GDP you can "take what you like from the design and make it your own. It might be the stamp set - the colors, the layout, the theme, the images - whatever you like that has inspired you to make a card of your own"


I embossed Whisper White cardstock with the Dainty Diamonds embossing folder for the background for all three squares. I have added circle outlines die cut from Basis Black cardstock using the Layering Circle dies.
I have used the Well Said stamp set to pick three sentiments which are perfect for an album you are creating for your significant other. I used the Layering Ovals dies and Rectangle stitched dies to cut them out.

The flowers are from the Forever Blossom Stamp set and have been die cut with the Cherry Blossom dies. They have been lightly coloured with Petal Pink Stampin' Blends.


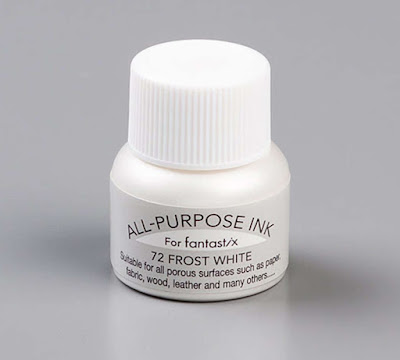
I literally painted the colour onto Whisper White cardstock. To do this I mixed some of the Frost White Shimmer Paint with Seaside Spray.
The Seaside Spray ink refill will soon be available in the UK but I didn't let the fact I didn't have it stop me. I literally pressed my ink pad onto a teflon sheet and then added the Shimmer Paint to it and mixed it with a paintbrush.
I loved the effect I created but I wanted to take it further so I embossed the painted cardstock when it was fully dry with the Dainty Diamonds Embossing Folder.

Using the Rectangle Stitched dies I die cut two rectangles and positioned these on my card using Dimensionals.
I die cut two leaves from the Forever Flourishing dies and glued them into position.
I then decided to then apply the White Shimmer Paint lightly over the leaves (although I now wish I did this before I adhered them - however, it was an afterthought ). I love white on white but I felt it needed a little extra something.


For the final touch I added two Clear Epoxy Droplets, into the centre of the diamonds. I lightly coloured them with Seaside Spray Blends but the effect is very subtle.
I know lots of people suggest using odd numbers when applying embellishments but I honestly think even numbers are okay when used in this way! I hope you agree?

I hope you have enjoyed looking at my project today! If you like my card I would really appreciate you taking the time to vote.
To vote, please click the button above then scroll down Kylie's blog post until the gallery of cards appears.
Make sure you have a good look at all of the cards - to get a better closer look simply click on the card and you will be taken to the creators blog.
You can make five votes so don't forget to use them all! All you have to do is click the heart in the top right hand corner on each card that you like.
The top ten winners will participate in a Blog Hop before the end of the month.


It's that time of the month again!
Each month I enter a handmade card I've designed into Kylie Bertucci's International Blog Highlights. It's great to see crafters from all around the world take part. A great source of inspiration!
The theme is 'Thank You' - you can check out all of the thank you cards entered by clicking on the banner below.
If you like my card, please vote for me - you can find more information on how to vote further down this page.

I've used the Foam Adhesive Sheets to adhere the letters to the card - they are a game changer! I've been hoarding them for a few weeks and I've just told myself to use them and I'm so glad I did! (I can buy more when they run out, right?)


To vote, all you need to do is click the button above then scroll down Kylie's blog post until the gallery of cards appears.
Make sure you have a good look at all of the cards - to get a better closer look simply click on the card and you will be taken to the creators blog.
You can make five votes so don't forget to use them all! All you have to do is click the heart in the top right hand corner on each card that you like.
The top ten winners will participate in a Blog Hop before the end of the month.

Thank you for taking the time to visit my blog today! I would love you to leave a comment and say hi
If you'd like to place an order and would like to receive my product recommendations for this card, please get in touch with me through my contact form or visit my online shop.

Classic Monochrome Thank You Cards featuring Peony Garden DSP from Stampin' Up!
Sunday, July 26, 2020 Bridgwater, UK


If you haven't already done so, click here to subscribe to my VIP newsletters, I have one going out very soon with an offer exclusively for customers and subscribers to have access the Shadow Box Book Card Video Tutorial with a qualifying purchase!


Card measurements:
- Cardbase - 29.7 cm x 10.5 cm (score at 14.9cm)
- Layer 1 - 8.8 cm x 13.2 cm
- Layer 2 - 8.4 cm x 12.8 cm
- Layer 3 - 8.0 cm x 12.4 cm (video states 8.1 cm incorrectly)


Social Icons